Table of Contents
Camera Tool
The camera tool is a tool to professionally take screenshots. Positions can be stored in keyframes and single screenshots or whole sequences can be captured with a camera that is not limited by the map surface and zoom boundaries.
Access Camera Tool
camera tool button in toolbar
The camera tool can be enabled/disabled in the settings menu. You can reach it from the main menu or exit menu by clicking on SETTINGS and switching to the ADVANCED tab there. Make sure that Enable camera tool is activated.
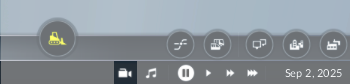
To open the camera tool ingame, press the ![]() button in the bottom right corner of the toolbar as seen in the image on the right. Alternatively it is possible to set a hot key in the CONTROLS tab of the settings menu.
button in the bottom right corner of the toolbar as seen in the image on the right. Alternatively it is possible to set a hot key in the CONTROLS tab of the settings menu.
Camera Controls
The default controls with the keyboard are the same as with the normal ingame camera:
- W A S D keys to move the camera in direction of the upper, left, lower and right edge of screen/window
- Q and E keys to rotate the camera clockwise and counter clockwise
- R and F keys to tilt the camera angle up and down
- X and Y keys to zoom the camera in and out
Camera control with the mouse is different from the normal ingame camera:
- Hold right mouse button and drag to move the camera along the Z-axis.
- Hold left mouse button and drag to move the camera along the X- and Y- axis.
- Hold middle mouse button and drag to pan and tilt the camera.
- Use the mouse wheel to zoom the camera.
Settings
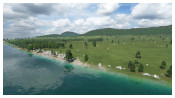
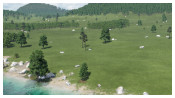
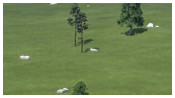

different focal lengths
Both modes share some common settings. These are located in the header area of the camera tool window
The left dropdown ![]() let you select the output resolution for screenshots. Available are 1280×720px (HD ready), 1920×1080px (Full HD), 2560×1440px (2k), 3840×2160px (4k) and 7680×4320px (8K).
let you select the output resolution for screenshots. Available are 1280×720px (HD ready), 1920×1080px (Full HD), 2560×1440px (2k), 3840×2160px (4k) and 7680×4320px (8K).
The other dropdown ![]() offers different focal lengths: 20mm (game standard), 35mm, 55mm, 85mm, 135mm, 400mm.
offers different focal lengths: 20mm (game standard), 35mm, 55mm, 85mm, 135mm, 400mm.
It is recommended to play with these settings and the zoom level to find out the best combination for your desired capture.
Picture Mode
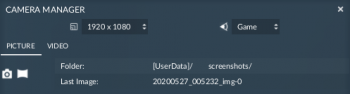
picture mode dialog
To take a screenshot in the PICTURE mode:
- Select the desired output resolution
- Select the desired focal length
- Place the camera
- Click the
 button
The GUI elements are not displayed in the final screenshots. Those can be found in the userdata/.../screenshots folder.
The other button ![]() can be used to generate texture files for a skybox.
can be used to generate texture files for a skybox.
Video Mode
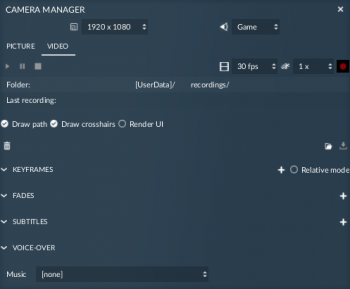
video mode dialog
The video mode has two additional settings which can be selected in the upper right area of the VIDEO tab. The dropdown next to the ![]() button offers several options for framerates: 5, 15, 30, 45, 60 or 120 frames per second. While high framerates result in fluent sequences, they require a lot of space for file storage. The other dropdown next to the
button offers several options for framerates: 5, 15, 30, 45, 60 or 120 frames per second. While high framerates result in fluent sequences, they require a lot of space for file storage. The other dropdown next to the ![]() button can influence the simulation speed while recording. You can choose pause, 1× , 2× or 4× speed.
button can influence the simulation speed while recording. You can choose pause, 1× , 2× or 4× speed.
A sequence is defined by two or more keyframes. To capture a keyframe, press the ![]() button to the right of KEYFRAMES. For each keyframe, you can change several properties:
button to the right of KEYFRAMES. For each keyframe, you can change several properties:
- Time since begin of the sequence in seconds
- Speed is the speed of the camera movement in the spot of the keyframe. It can be recalculated to get a linear movement with the pen button next to it.
- Focal Length at each keyframe
- Sky rotation in degree from -180 to 180
- Coord.sys. can be used to attach the camera to a model entity in the game world by specifying its entityID. -1 is used to detach the camera. The second field is used to specify the group in the particular model.
You can adjust keyframes and their order by using the rightmost buttons:
 allows you to recapture the keyframe at this point
 moves the keyframe one step upwards in keyframes list
 moves the keyframe one step downwards in keyframes list
 removes the keyframe
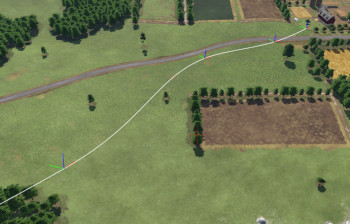
a path with some keyframes
The ![]() button removes all keyframes.
button removes all keyframes.
To control playback and record of the sequence, you can use the buttons in the top left and right corner:
 starts/resumes the playback of the keyframe path
 pauses the playback and stays at the current position
 aborts the playback and jumps back to start position
 starts recording of the actual sequence (this may take a while!)
The GUI elements are not displayed in the final sequence screenshots. Those screenshots can be found in the userdata/.../recordings folder.
Beside the keframes, it is possible to add fades (in or out) and subtitle timestamps as well as to select a voice over. These meta data can be used for mission script cut scenes (like the campaign uses).
It is possible to store and load sequence configurations. Press the ![]() button to open a list with saved configurations and select one to load. Press the
button to open a list with saved configurations and select one to load. Press the ![]() button to store a configuration. They are stored in the userdata/.../keyframes folder.
button to store a configuration. They are stored in the userdata/.../keyframes folder.